Mother’s Day is a celebration honoring mothers and celebrating motherhood, maternal bonds and the influence of mothers in society. You can always give a gift for mom. There is no special occasion for it though. Isn’t it??
We will learn how to make a lovely mother’s day photo manipulation using photoshop cs5.
Lets start!
Sources used:
Mother
Clouds
Sky
Heart
Light beams brushes
Sparklies brushes
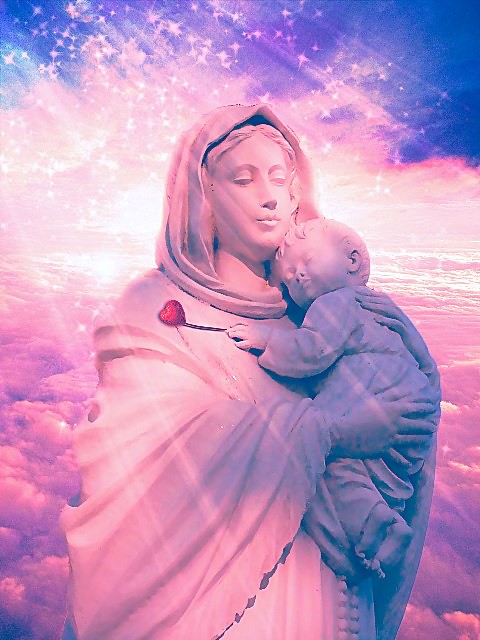
Final Image preview:
Step 1:
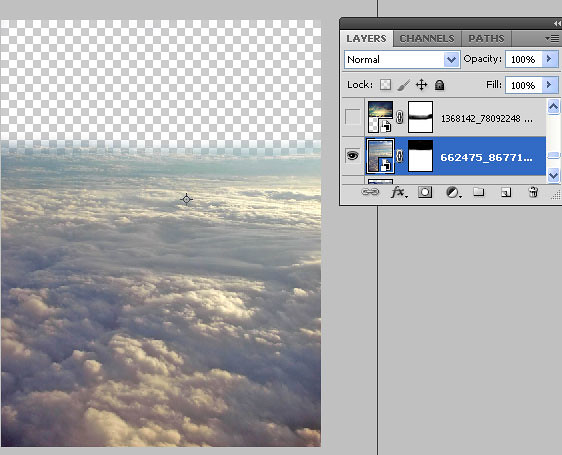
Open the clouds image in photoshop. Apply layer mask to this layer. You will get this image as shown below. If you are new to photoshop, you could simply select the eraser tool and erase the top part of the clouds.
Step 2:
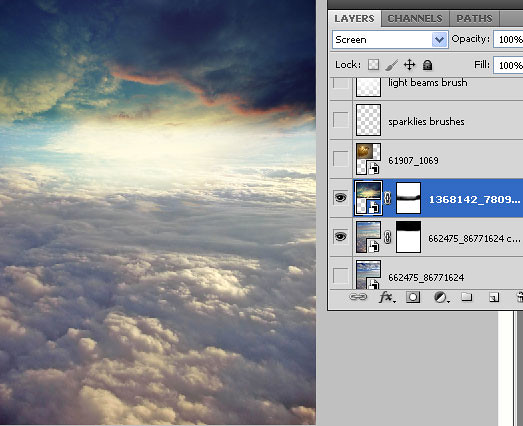
Now open the sky image and drag it to a new layer. Apply layer mask and erase the edges of this sky so that it blends with the clouds layer. Now change the blending mode of this layer to screen.
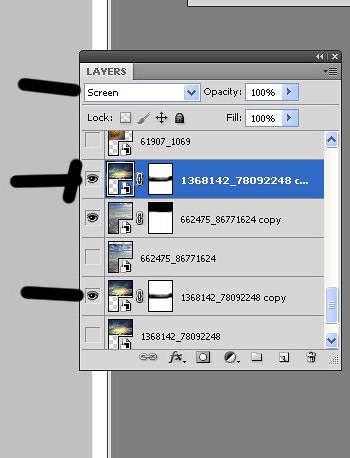
Now duplicate this sky layer and place this duplicated sky layer below the clouds layer. You can see that there are 2 sky layers as shown below. One sky is above the clouds layer and one is below the clouds layer.(indicated by arrows)
Step 3:
Now open mother’s image and drag it to a new layer. Apply layer mask and remove the background.
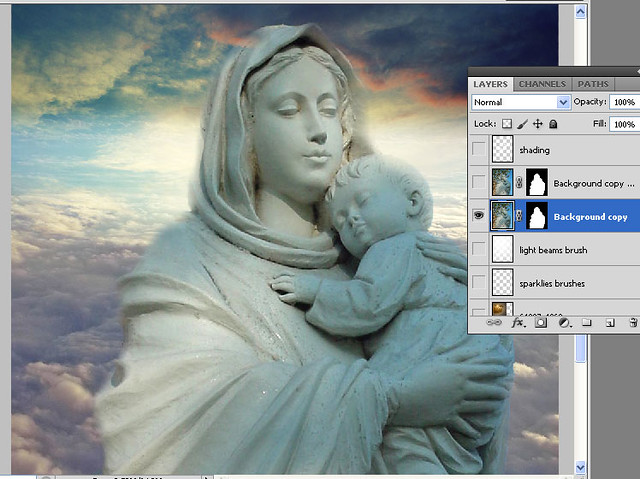
Step 4:
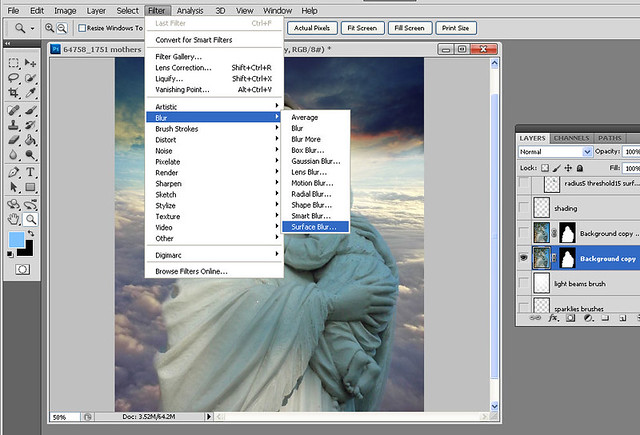
Now lets give the mother’s image a dreamy look.
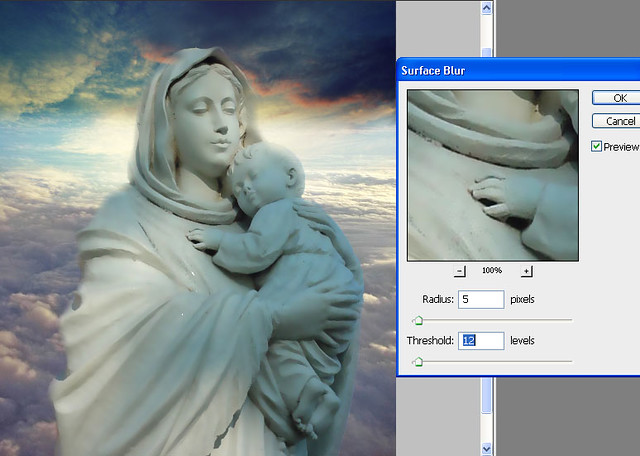
For this go to Filter > blur > surface blur. apply the values as shown.
Step 5:
Create a new layer. Change its blending mode to soft light. Now using white color soft brush of low opacity around 20% , paint on the selected areas near the mother’s face and on the child shown by arrows. This step gives highlights to the image.

Step 6:
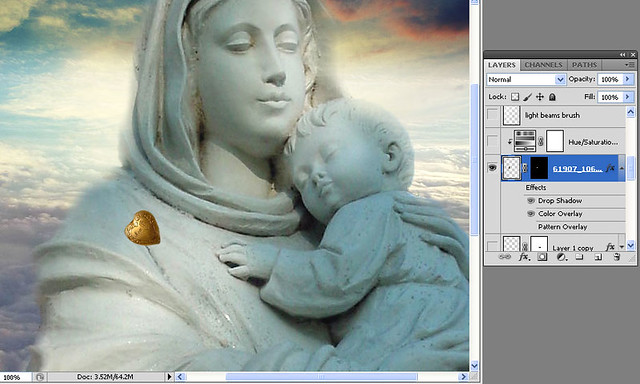
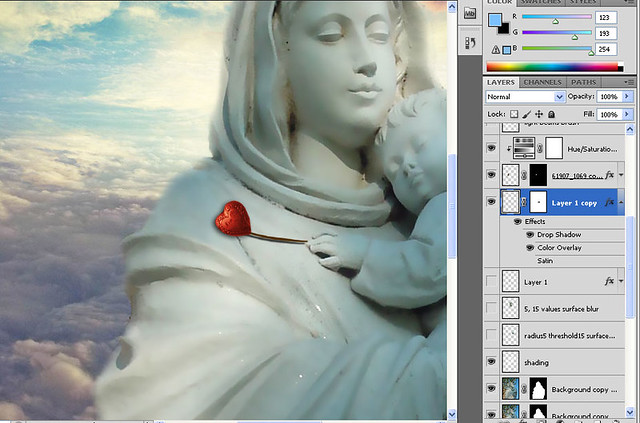
Now lets add the heart! Open the heart image. Remove the background and drag this heart to our document. Now make the heart smaller using free transform tool and place it as shown.
Step 7:
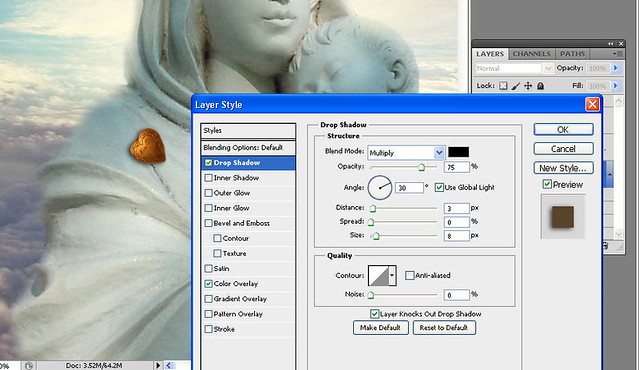
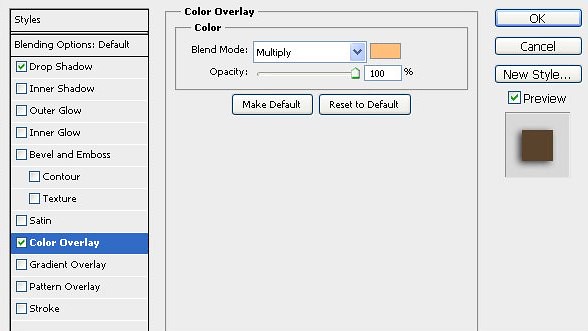
Now select the heart layer. Right click and select blending options. Apply drop shadow and color overlay to the heart. The values are as shown.
Step 8:
Now with the heart layer selected, apply hue/saturation by clicking below the layers panel. ( I have indicated this by an arrow).
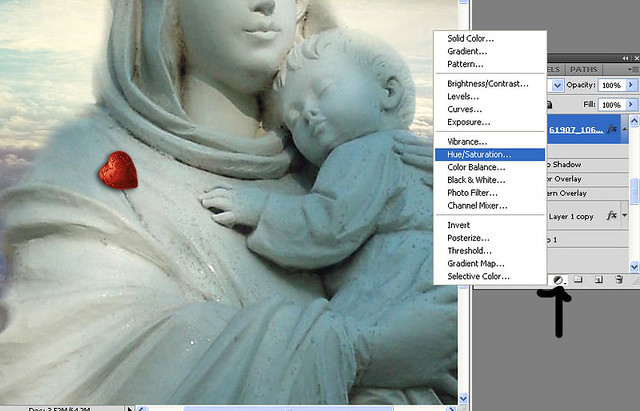
Now select the hue / saturation layer. Right click and select “create clipping mask” .
Clipping mask means only the layer below is effected.
Select the values for hue/saturation as shown below. Here this hue/saturation layer affects only the heart layer since we applied a clipping mask.
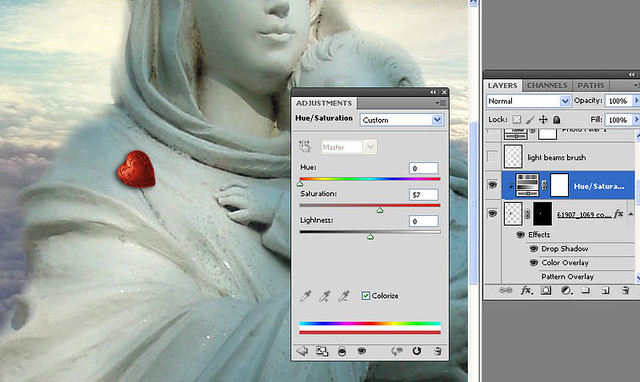
Now using your favorite drawing tool draw the line connecting the heart and apply the same settings of drop shadow and color overlay of the heart.
Step 9:
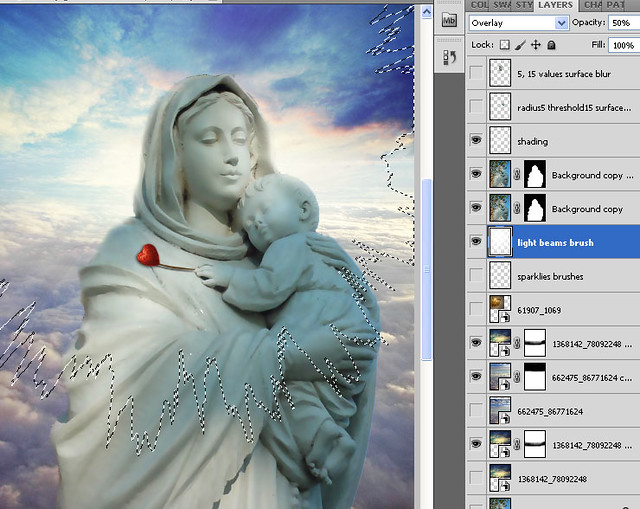
Create a new layer below mother’s layer. Change the blending mode of this layer to overlay and reduce the opacity to 50%. Now select light beams brush and click once. Make sure you select a white color.
Step 10:
Again create a new layer below the light beams layer. You can see the order of the layers below. Change the blending mode of this layer to overlay. Now select sparklies brush and paint using white color.

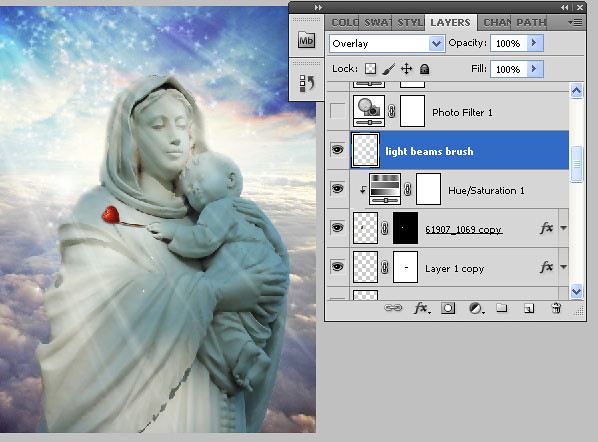
Create a new layer on top of all the layers. Change its blending mode to overlay. Select the light beams brush and paint the light rays.
Step 11:
Now apply photo filter.
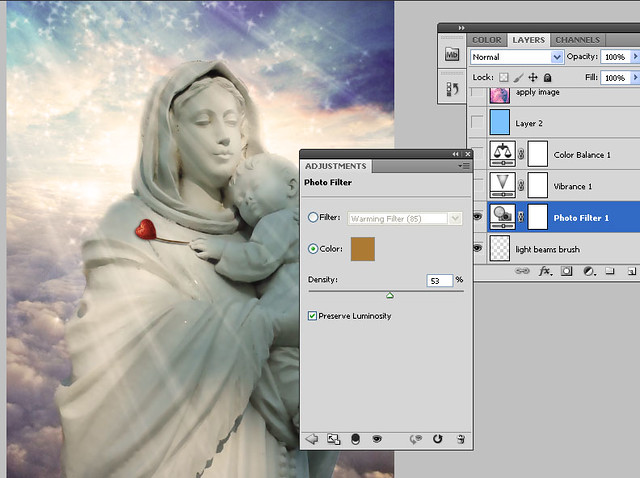
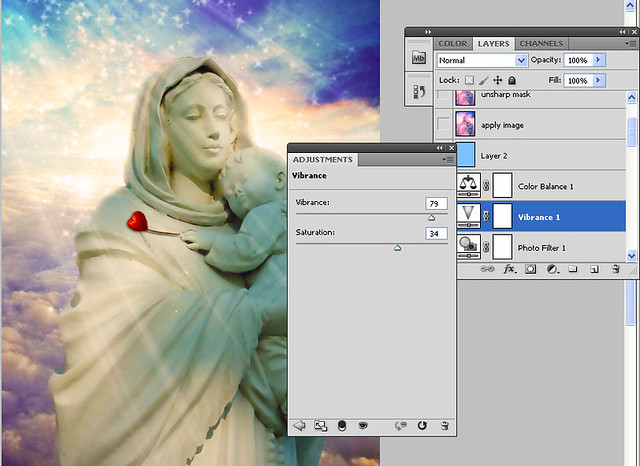
Now apply vibrance.
Step 12:
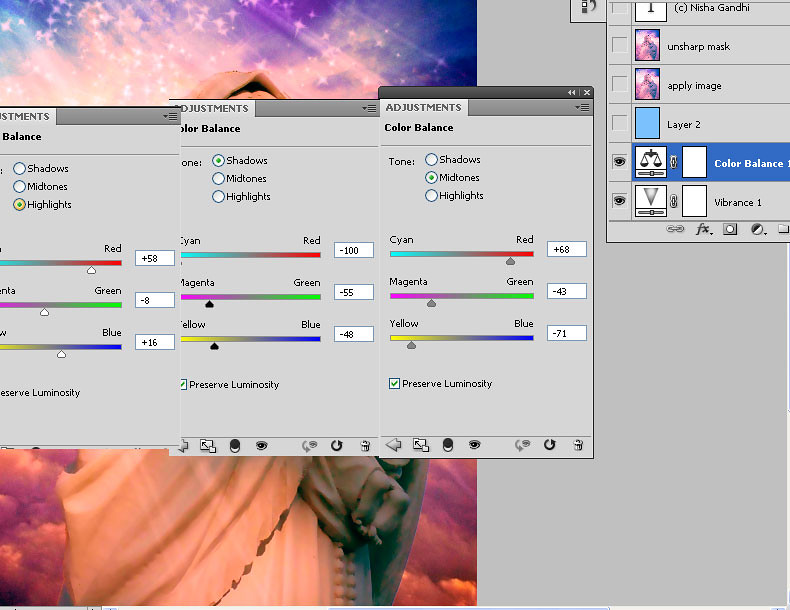
Apply color balance. The values are as shown.
Step 13:
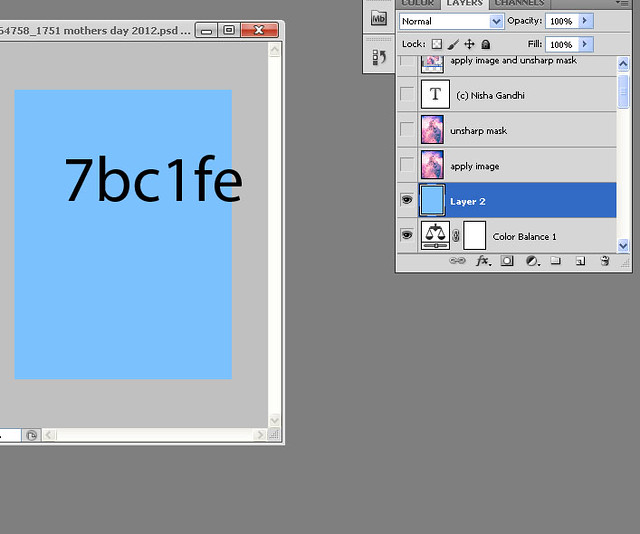
Create a new layer. Fill with a light blue color 7bc1fe as shown.
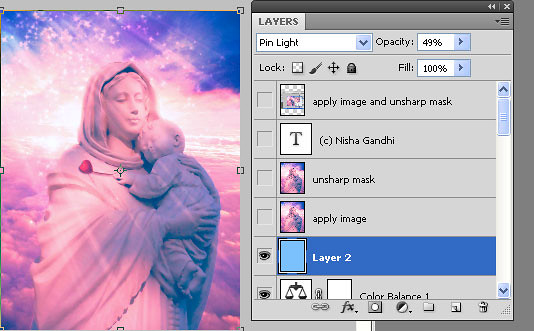
Now change the blending mode to pin light and reduce the opacity to 49%.
Step 14:
Now create a new layer and go to image > apply image. This step makes a final image version on a new layer. You can check the layers below for more idea.
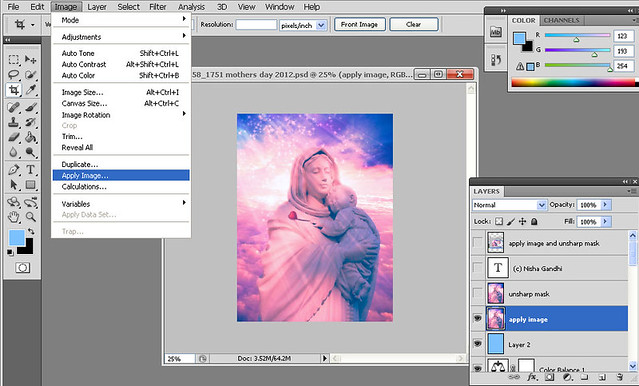
Step 15:
Now apply filter > sharpen > unsharp mask. This step brings on the little details back on our final image.
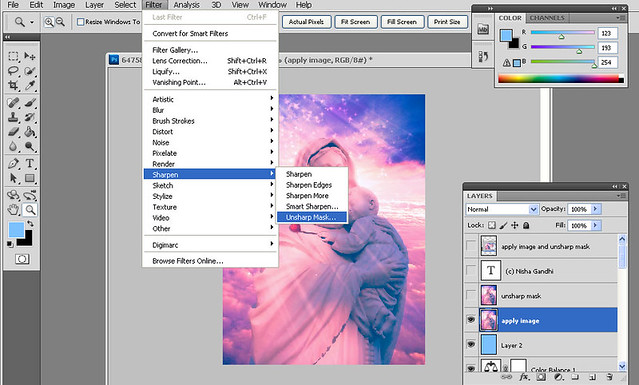
Apply the following values to unsharp mask.

This is the final image we get!!! I hope you enjoyed reading my tutorial!! 😀


very lovely tutorial, nice composition too
sweet and amazing:)
Thanks a lot Godwin!
thank u Simmi!!
Thank you for the great tutorial and for the pinterest button. A great way to organize tutorial links. Beautiful work.
thank u so much! glad u loved my work:)
Wow! Thank you for showing me how to get such a brilliant shot!
Thank you for the tutorial!
well set out tutorial