
Today we will be combining 2 images to make an interesting photo manipulation using photoshop. So lets start. 🙂
Sources:
CAT
HOUSE
Final image preview

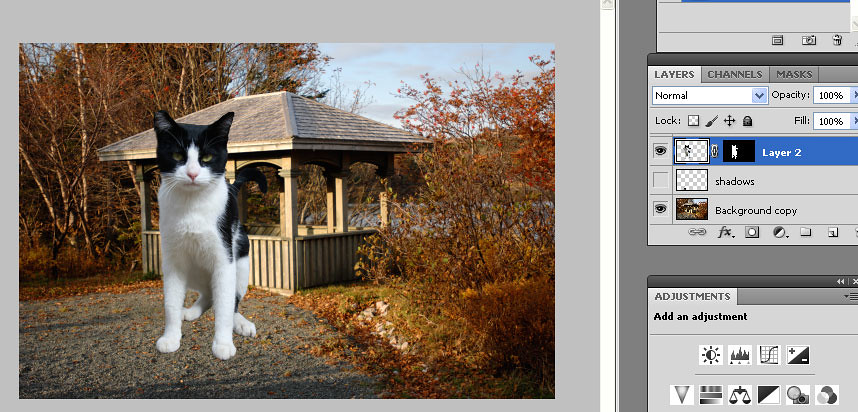
STEP 1:
Open the house image. Drag the cat image above the house layer. Remove the background from the cat image. I did this by applying layer mask to the cat layer. Now your image looks like this.
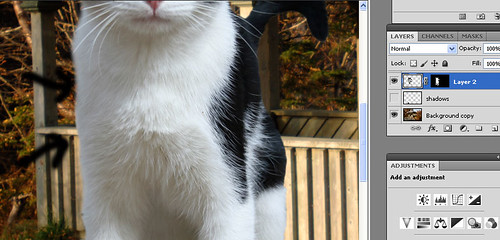
In this image, u can see that while applying layer mask to the cat, the hair at the edges of the cat have also been erased(shown by arrows). We can fix it.
STEP 2:
Use smudge tool with strength around 35 % select dry brush as shown, and draw the fur at the edges of the cat.

STEP 3:
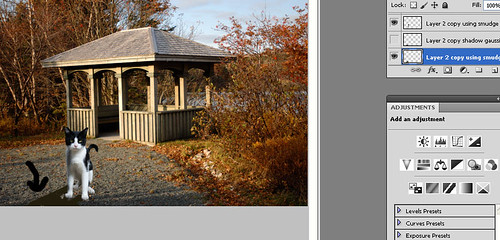
Now resize the cat. For the cat’s shadow, Duplicate the cat layer, fill it with a dark color than the ground, flip vertical and free transform it
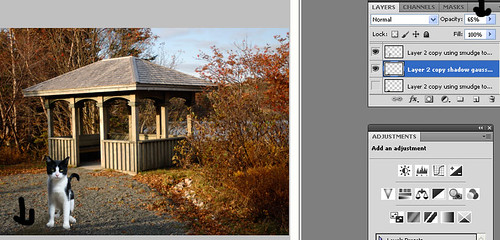
Now apply Gaussian blur to the shadow layer of the cat and lower the opacity to 65% as shown.
STEP 4:
Now create a new layer, set it to soft light mode. Paint shadows using a low opacity brush on the cat’s legs and on the left side of the cat.

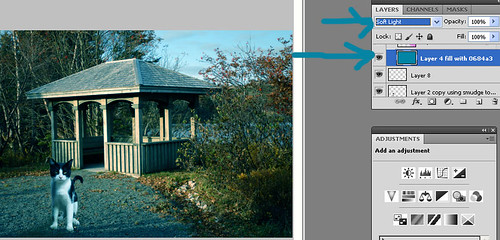
Step 5:
Create a new layer. Fill it with color 0684a3. Set this layer to soft light.
Step 6:
Create a new layer, set this to multiply mode. Paint with a pink color e278e6 on the area shown.
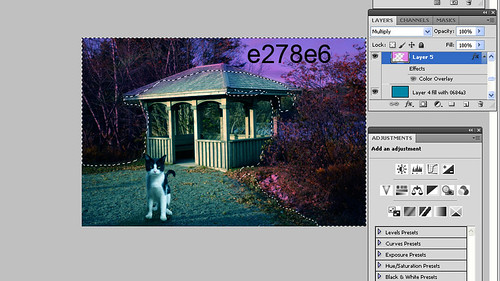
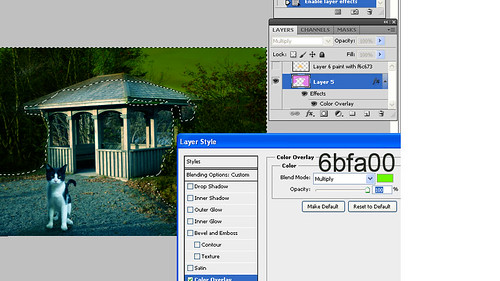
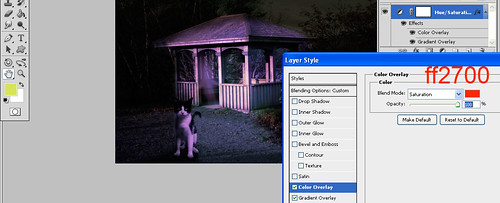
Step 7:
Apply color overlay to this pink layer.
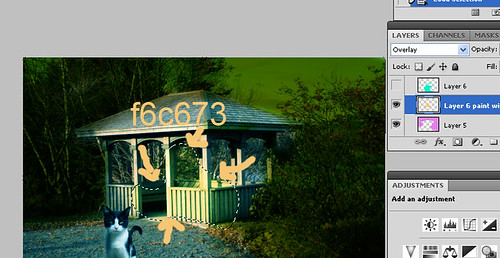
Step 8:
Create a new layer, set this to overlay mode. Paint with a light orange color on the area shown.
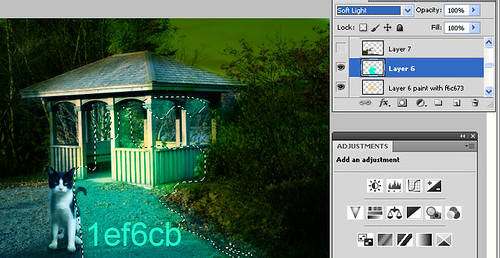
Step 9:
Create a new layer, set this to soft light mode. Use a light blue color 1ef6cb and paint on the area shown.
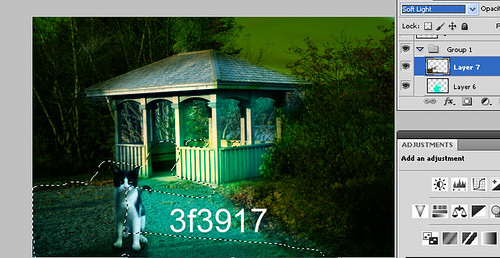
Step 10:
Create a new layer, set to soft light mode. Paint with a brown color 3f3917 on the selected area shown below.
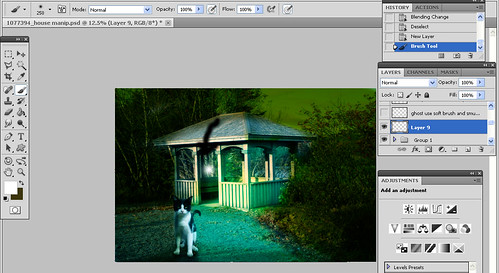
Step 11:
For the ghost, use a white color soft brush and click once in the house as shown.
Step 12:
Use smudge tool with a dry brush and smudge to form the ghost.
Step 13:
Reduce the opacity of the ghost layer to 50 %.
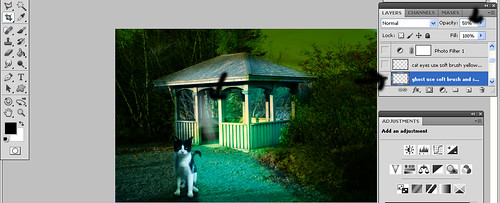
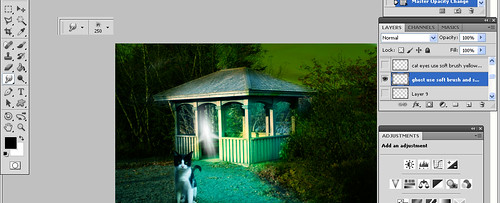
Step 14:
Create a new layer, set it to soft light mode. paint the cat’s eyes with a yellow color.
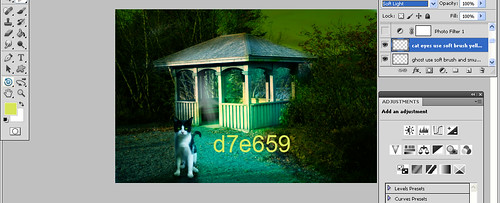
Step 15:
Apply photo filter.
Deep yellow-70 %.

Step 16:
Apply brightness/contrast.
Brightness is -18
contrast is 27
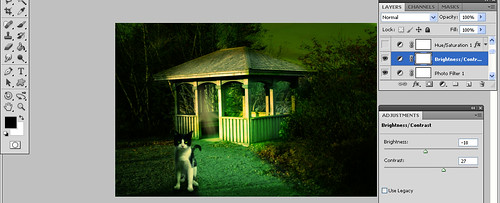
Step 17:
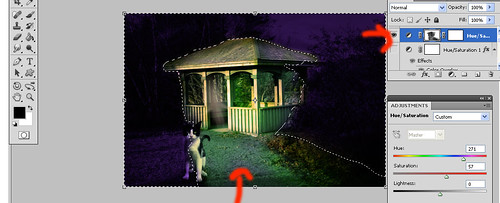
Apply hue saturation.
Hue 271
Saturation 57
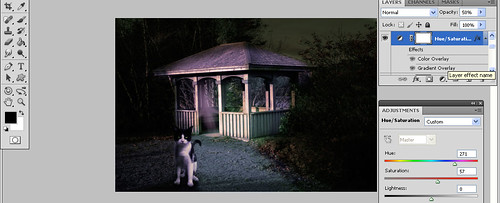
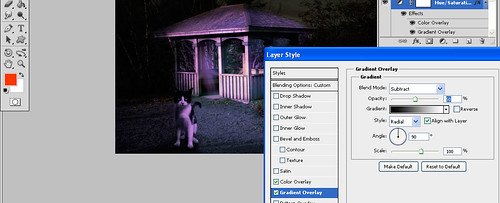
Apply color overlay and gradient overlay to the hue saturation layer.
Step 18:
Now add layer mask to the hue saturation layer. I erased the hue saturation part on the house, ground and cat part. This removes the violet colors and shows the green colors.
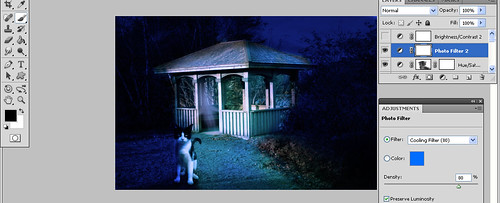
Step 19:
Apply photo filter.
Cooling filter(80) —– 80%
Step 20:
Apply brightness contrast.
Brightness 15
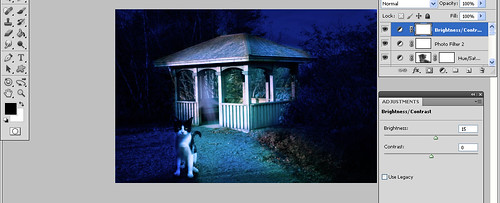
THIS IS THE FINAL IMAGE. HOPE U ENJOYED READING IT. 🙂


Very well explained tut and PURRRRRRRRfect result 😉 Thanks for sharing, Nisha 🙂
thank u so much my dear Cornelia! 🙂
That’s a lot of detail steps. Thanks so much for the tutorial.
much (hidden) work!
greetings by my cat!
http://flickrcomments.wordpress.com/2011/10/28/weekly-photo-challenge-hidden/
interesting
From simple to great perfect post 🙂
Great effect! 🙂
thank u so much everyone 🙂
Wow…spooky 🙂
Looks like you had fun creating. And a nice set of how it’s done shots too 🙂
thanks a lot everyone! 🙂
Great job!
And thanks for sharing the steps 🙂
You are very creative! Thank you for this!